GLAZING BARS
GLAZING BAR CONTENTS
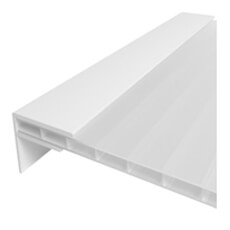
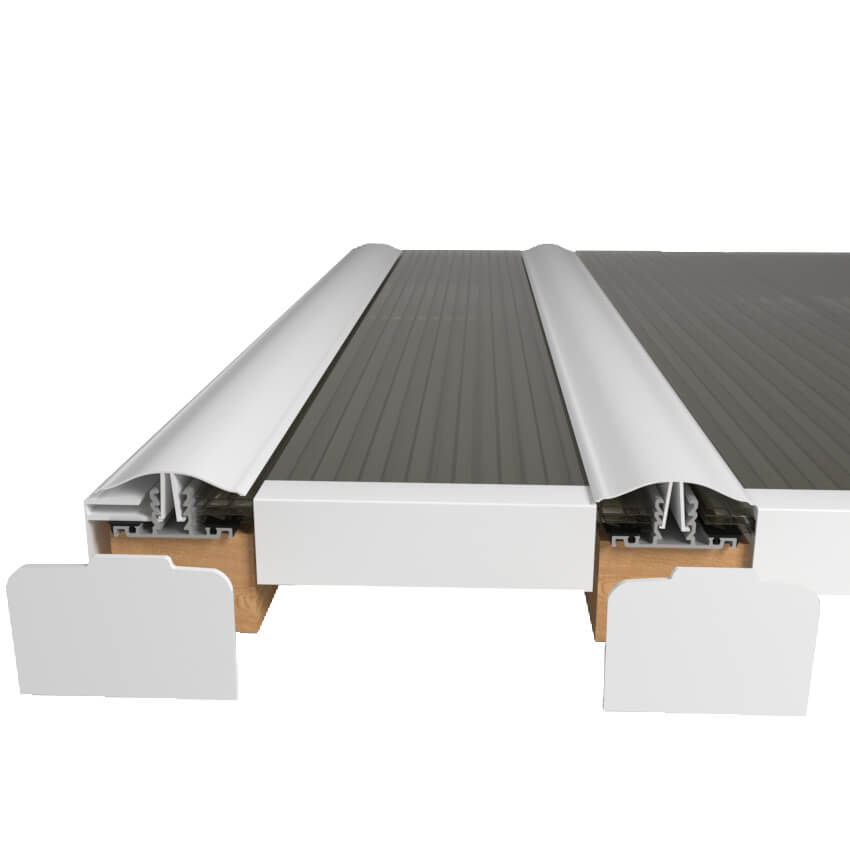
Glazing bars are a cost effective and easy solution to joining your sheets of polycarbonate roofing together. We offer two different ranges: Sunwood and Exitex.
Sunwood glazing bars come as a set without the rubber gaskets attached to the aluminium base. The gaskets typically come in rolls or lengths that are joined together and will need to be split in half before installing. Its contents are:
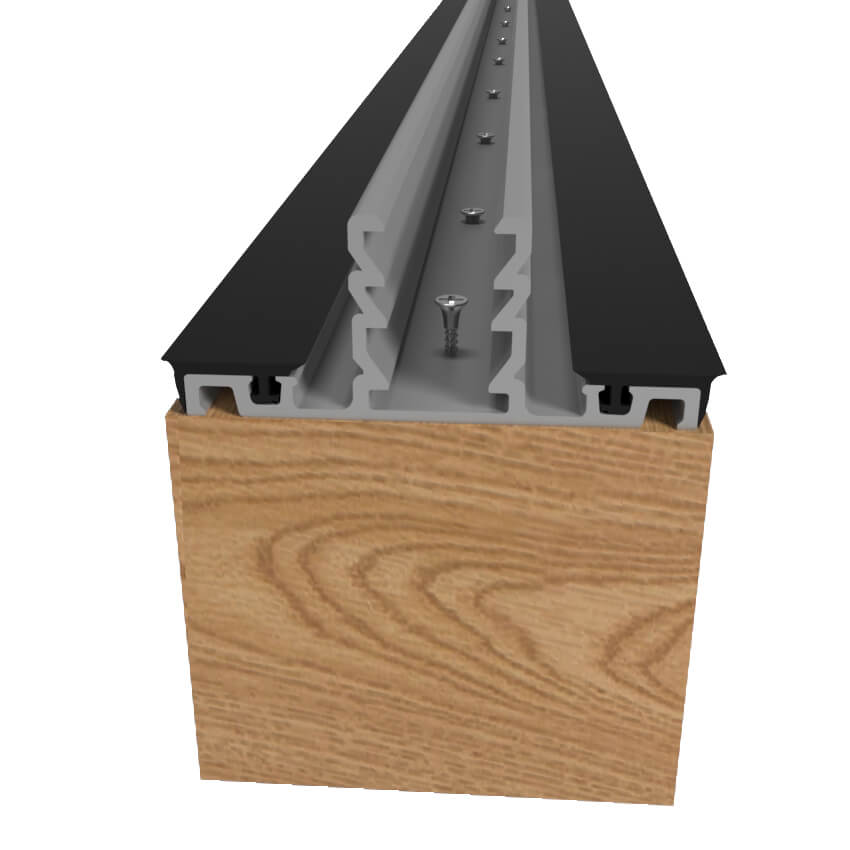
1 x Aluminium Base
2 x Rubber Gaskets joined together
1 x Plastic Snap Down Cap
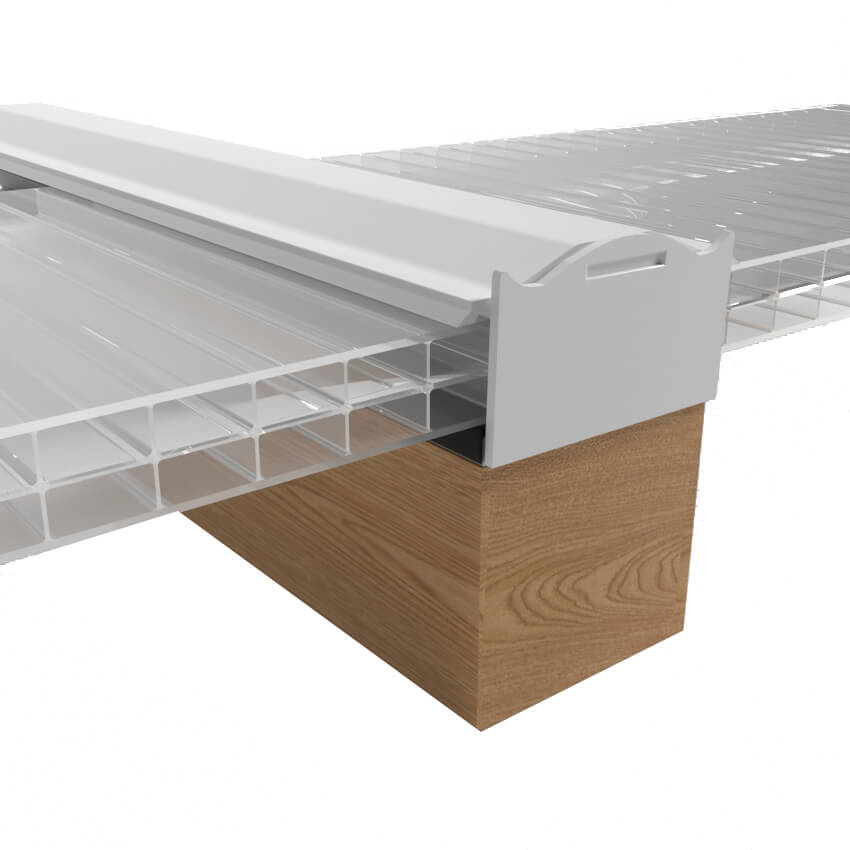
1 x End Cap
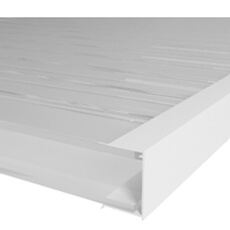
Exitex glazing bars come as a complete set with the gaskets pre-attached to the aluminium base. Its contents are:
1 x Aluminium Base
2 x Rubber Gaskets
1 x Plastic Snap Down Cap
1 x End Cap
BASIC INSTALLATION ADVICE:
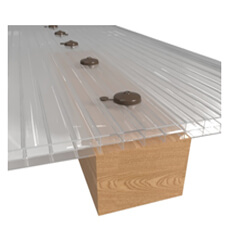
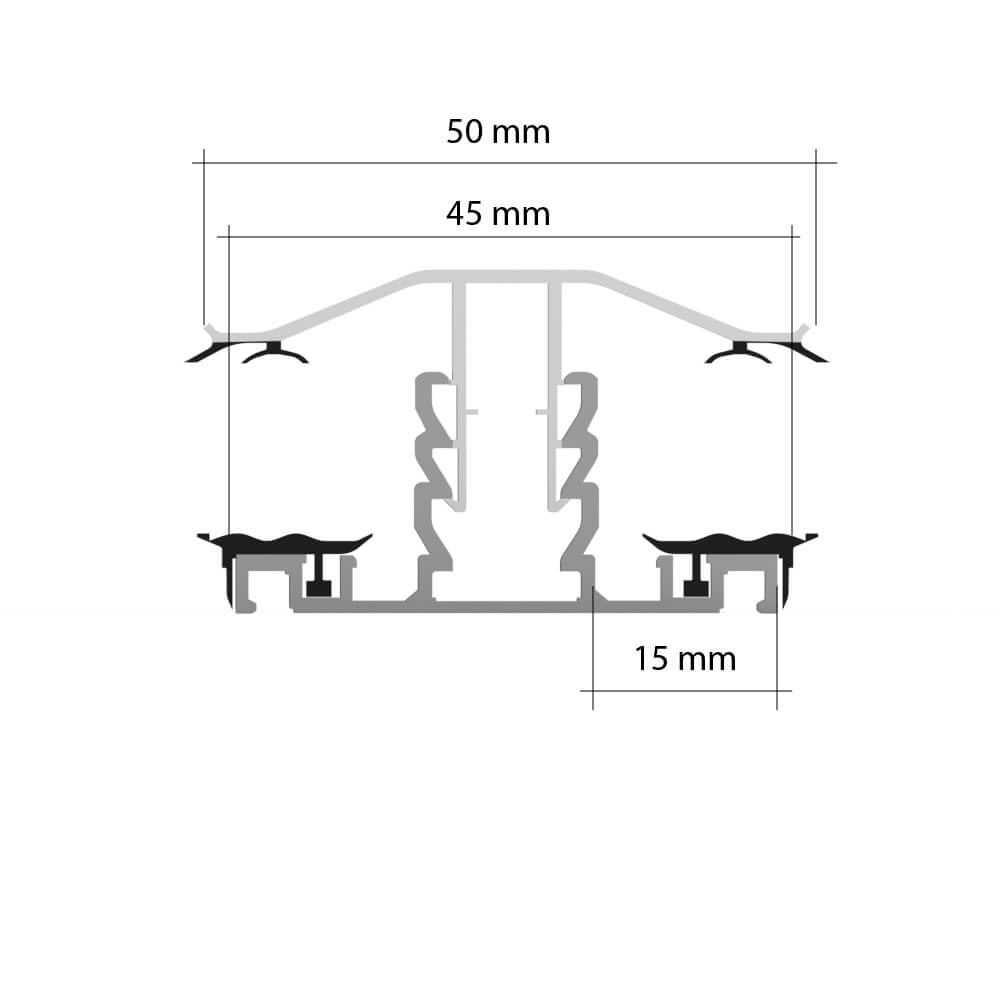
Ensure that you have adequate framework in place before installing your glazing bars. The width of the glazing bar is 50mm so ideally the minimum width of your rafter should be 50mm.
We recommend a minimum pitch of 10° (a fall of 175mm in every 1m). Pitches less then this should be avoided because water run off may be reduced and ‘puddles’ on your roof could form.
When calculating the width of the sheets, allow 15mm per side for the glazing bars.
Glazing bars are not designed to support its own weight or the weight of the sheet by itself. It needs supporting on a solid rafter structure e.g. timber.
Drill in the centre of the glazing bars in between the toothed legs, we recommend screwing at no more than 400mm interval and around 75mm in from either ends.
Ensure that the rubber gaskets are fitted and pushed into place on both sides of the Glazing Bar.
One the sheets are positioned, push the PVC Snapdown Top Cap into place firmly starting from one side to the other. This will offer a weather tight finish.
We do recommend running a small line of silicone along the sides of the glazing bars to offer further protection.
Removing glazing bars: Where possible, you can slide the glazing bar pvc top caps off with some pressure however this may remove the sheets along with the top cap. Alternatively, there is a glazing bar capping removal tool that can be outsourced which inserts easily between the capping legs and glazing bar upstand. Please note this item will need to be outsourced, we don’t sell it.
OTHER ACCESSORIES YOU MAY NEED
Please see below links to other accessories you may need for the installation of your Polycarbonate Roofing